When you point your domain to ClickPress by changing the DNS settings, you move all DNS management to ClickPress. This means that ClickPress will handle all DNS records associated with your domain, including A, CNAME, and MX records.
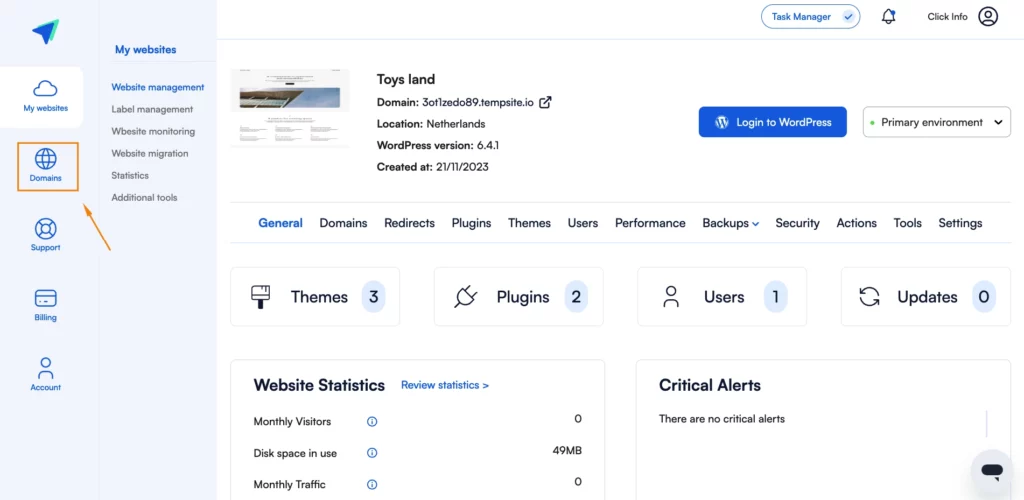
Step 1: Click on Domains on the left side.
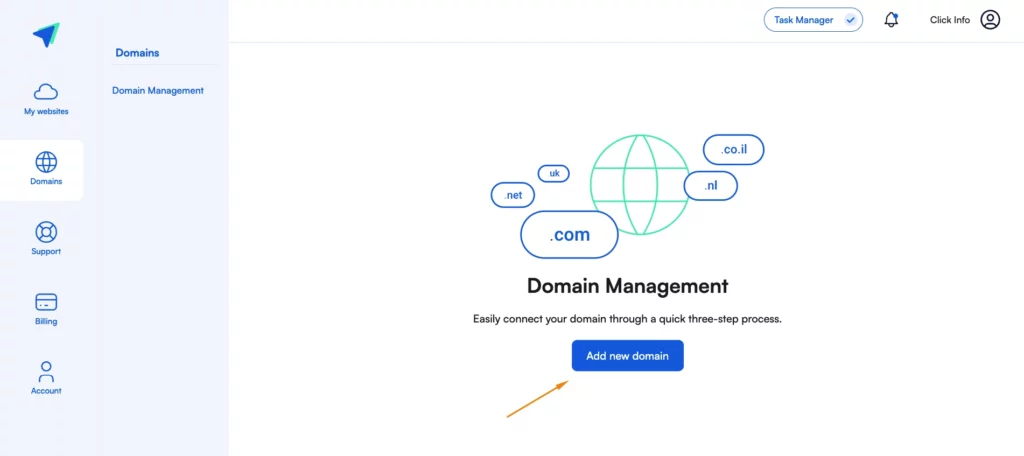
Step 2: Click on the blue button Add a new domain.
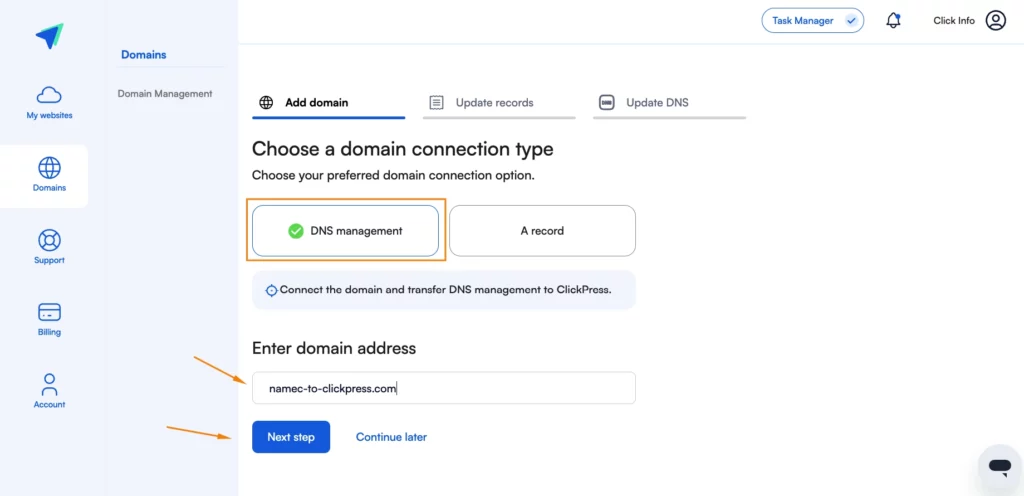
Step 3: Choose the DNS management option, type in your domain address, and then click on Next step.
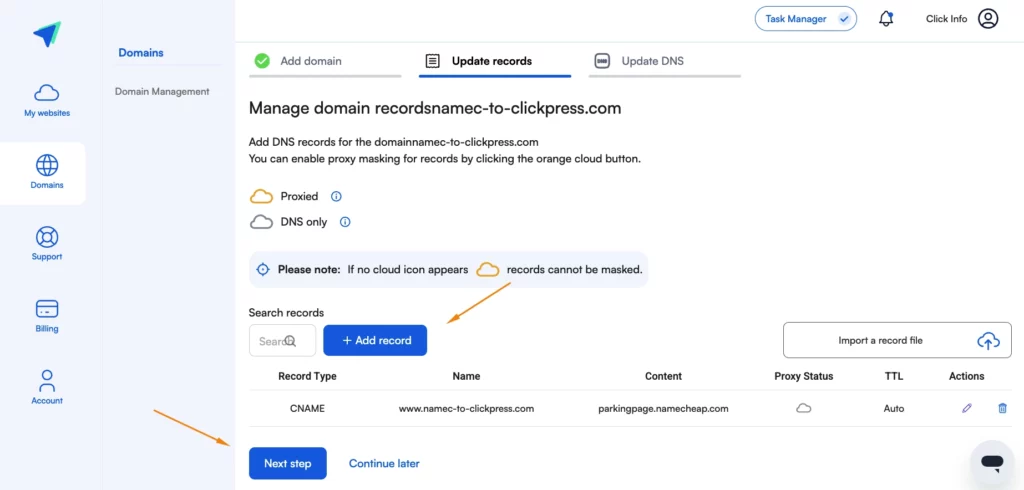
Step 4: Please be aware that if you have additional records, such as emails or Landing pages, it is crucial to include them at this stage. Please add these records to ensure services are correctly routed.
If you are not interested in referring additional records besides NS, click on the Next step.
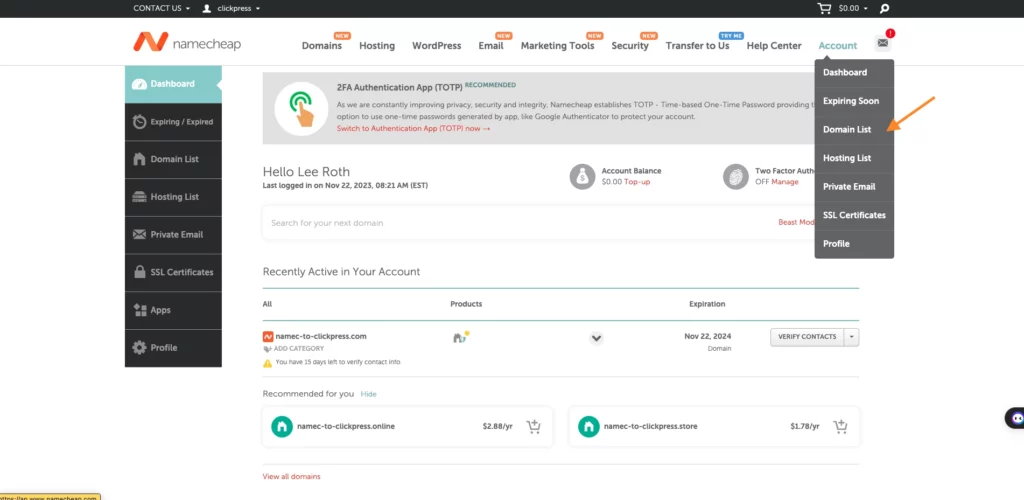
Step 4: Log in to your account at Namecheap.
Step 5: Navigate to Account on the right side and click on Domain List.
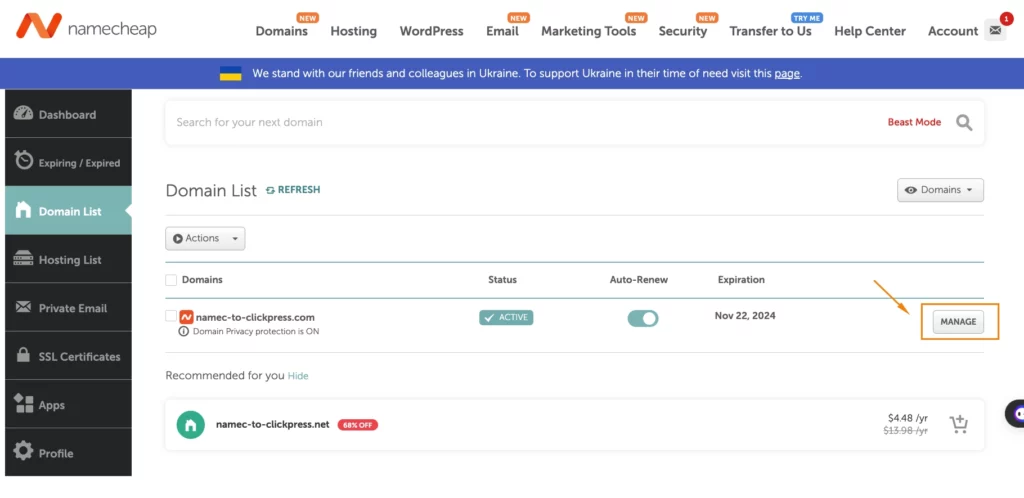
Step 6: Click on Manage.
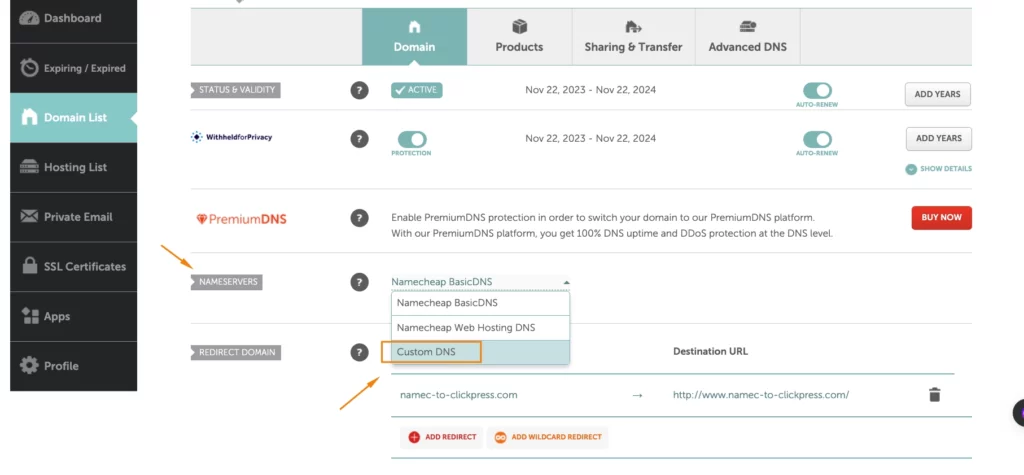
Step 7: Scroll down to NAMESERVERS and click on Custom DNS.
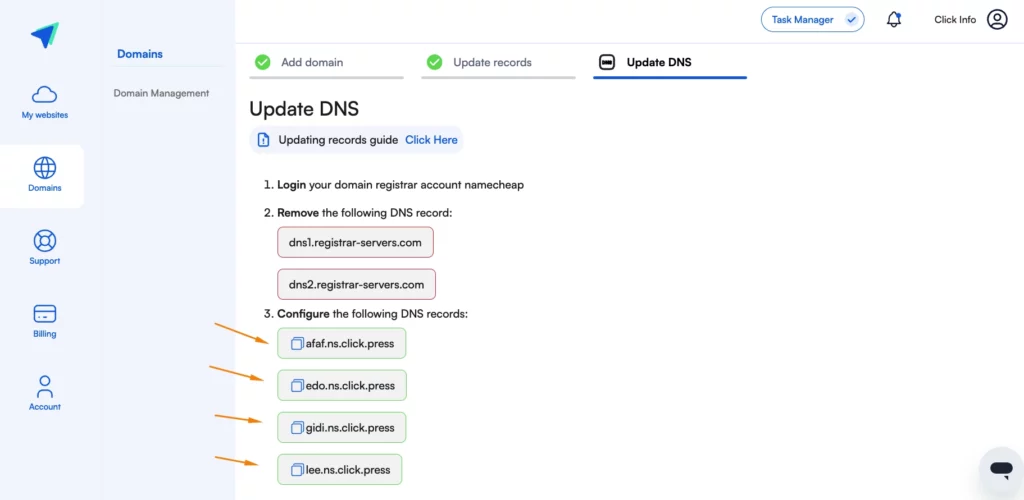
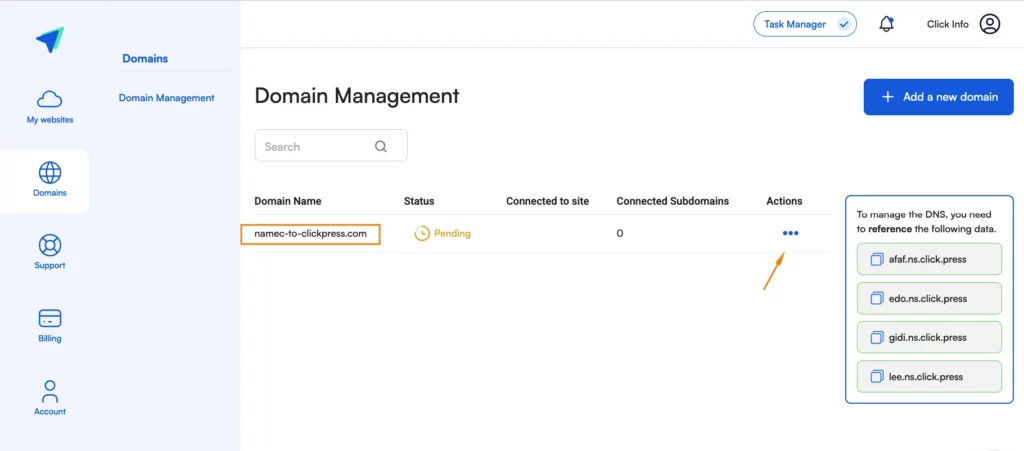
Step 8: On the DNS update page in the ClickPress interface, copy the 4 records.
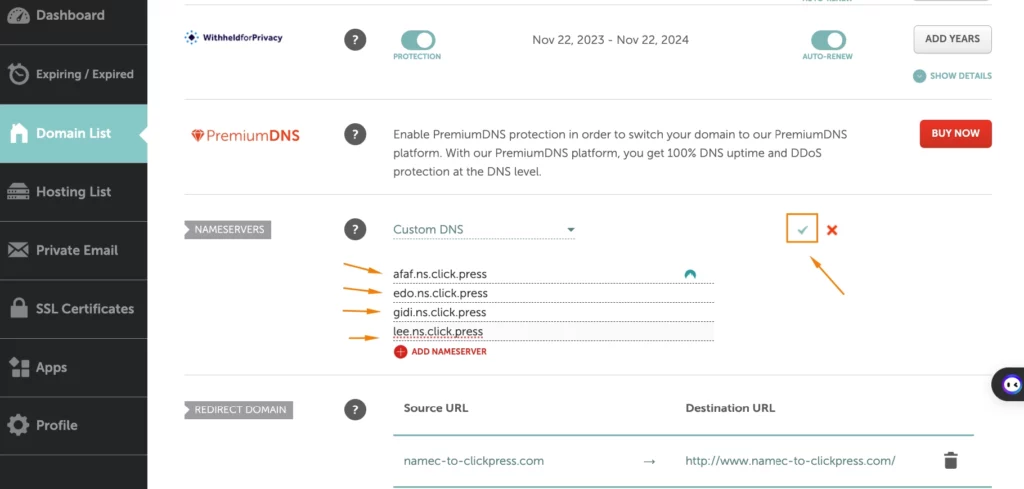
Step 9: Paste the 4 records, then click on the ‘V’ green icon.
afaf.ns.click.press
edo.ns.click.press
gidi.ns.click.press
lee.ns.click.press
Last step: Click on verify on the update DNS page.
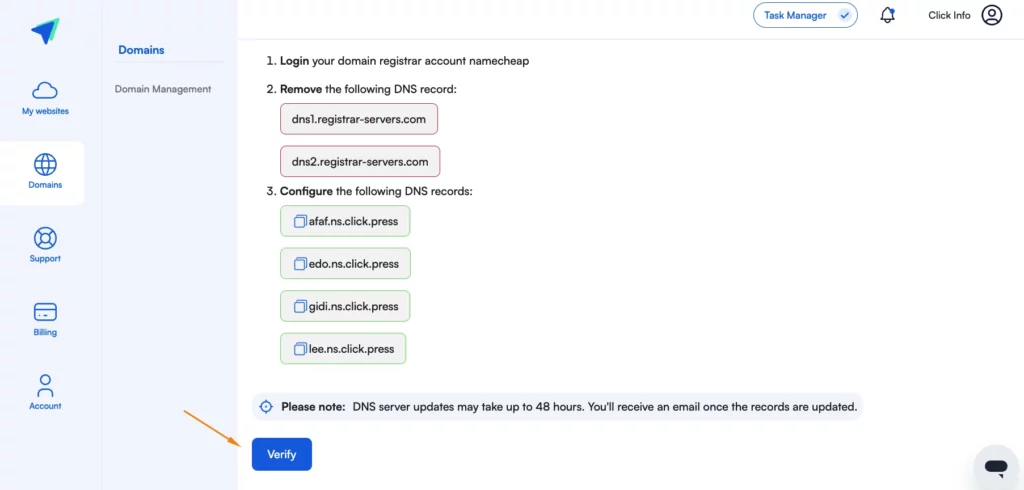
Please note: The process may take up to 48 hours after connecting the domain. You can check the domain status by clicking on the three dots.
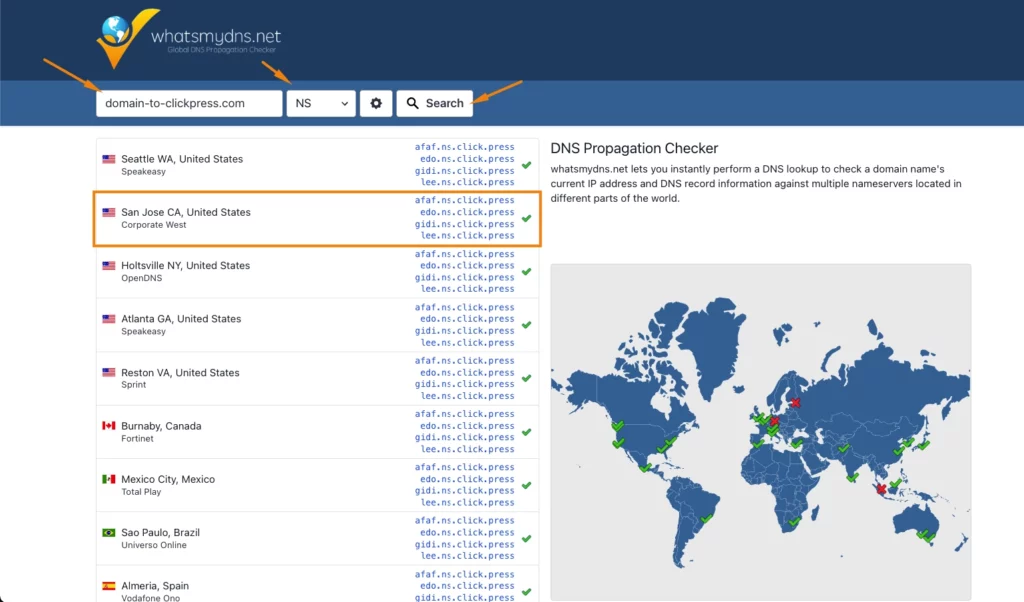
You can visit the website WhatMyDNS to track your domain referral process and notice when it points to ClickPress servers. Type your domain, choose NS, and click the search button.