
Through the ClickPress site management dashboard, you can add your WordPress easily and quickly. Here’s how you can do it:
Add new Site
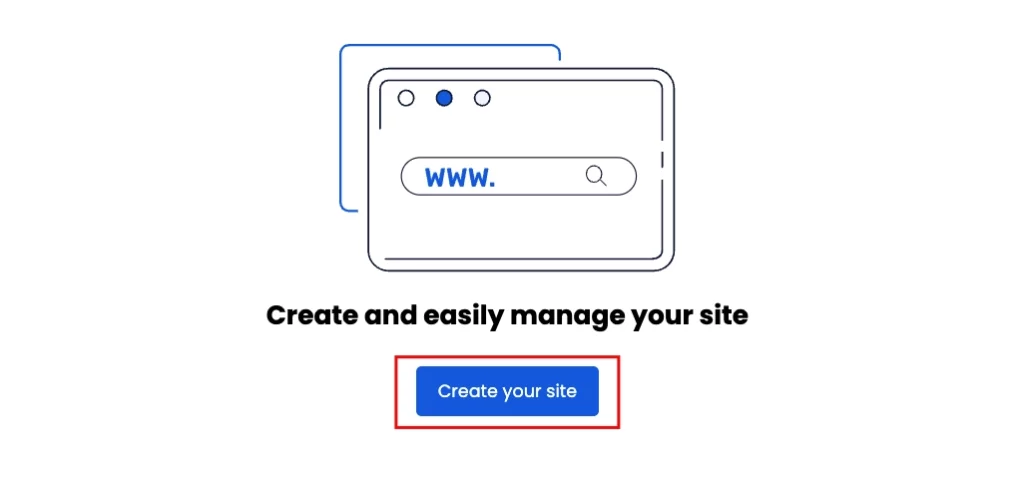
Step 1: Click on the ‘Create your site’ button.
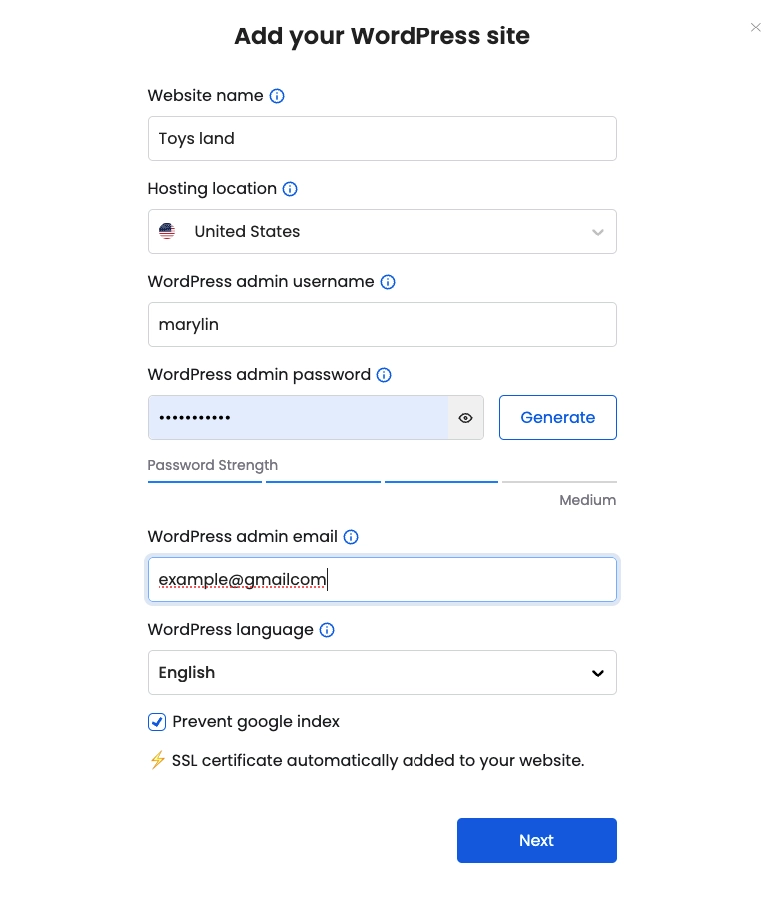
Step 2: Enter the required information:
Website name: Name your WordPress site. The name will be displayed in your ClickPress interface but won’t be visible to your site’s visitors.
Hosting location: Choose a data center for your WordPress site. This is where your data will be stored and delivered from.
Admin username: Create an admin username to log into your WordPress.
Admin password: Create a password to log into your WordPress account. We recommend clicking the ‘Generate’ button to receive a strong, secure password.
WordPress admin email: Set up your admin email to receive important updates and notifications.
WordPress language: Choose the language you want for your WordPress panel.
Google Index (Optional): You can choose to prevent Google from indexing your site. If you select this option, search engines won’t display your site in search results, keeping it private and unsearchable.
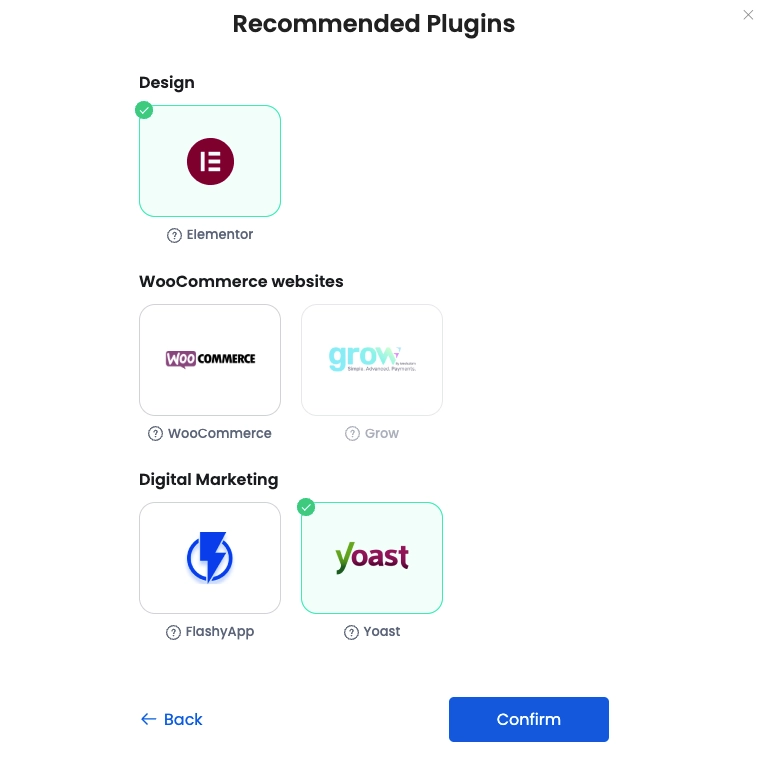
Step 3 (Optional): Select from the recommended and popular plugins to be automatically downloaded to your new website. Then click ‘Confirm.’
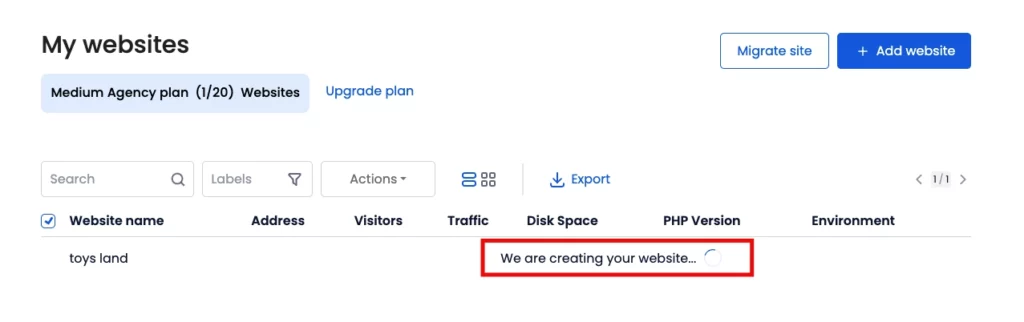
Your website will be created and ready in 2-4 minutes. You can check its status by clicking on the Task Manager.
Our support team is always available to assist you with any questions or issues through live chat or by submitting a support ticket via the site management dashboard.