
How to Set Up Website Monitoring
The website monitoring provides real-time email alerts for downtime and performance issues. It helps website owners promptly address problems, minimize disruptions, and maintain website availability.
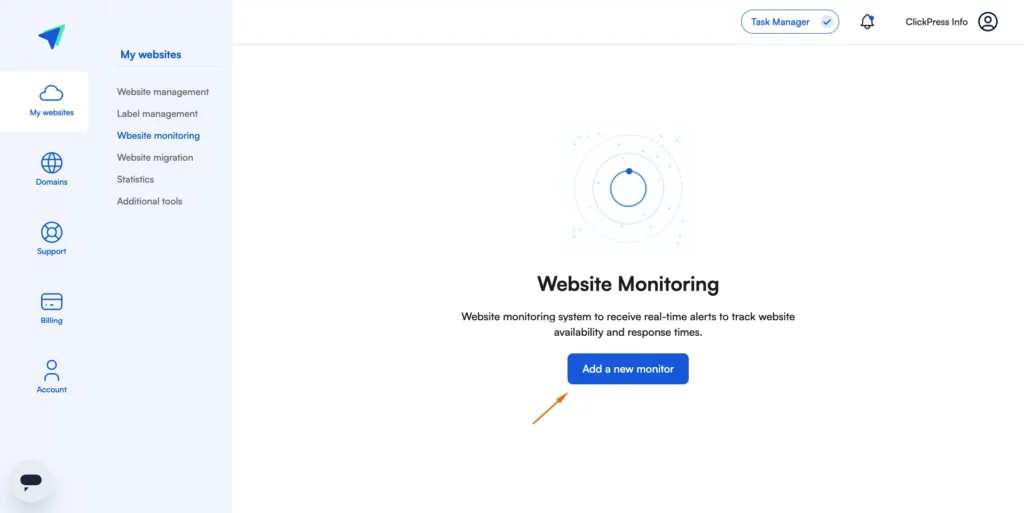
Step 1: Click on Website Monitoring on the left side.

Step 2: Click on the blue button Add a new monitor.
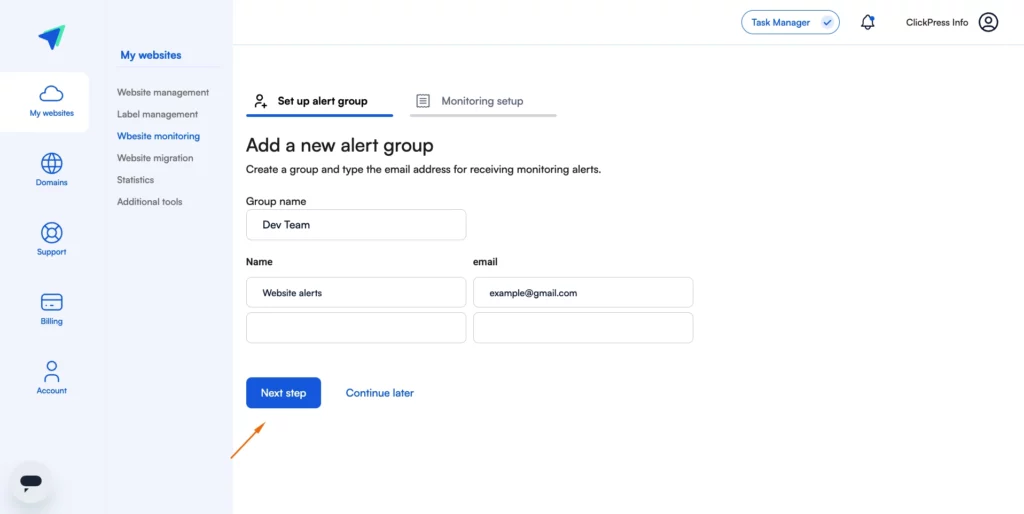
Step 2:
- Create a group name.
- Add a website name.
- Define which email address will receive alerts, and click Next step.
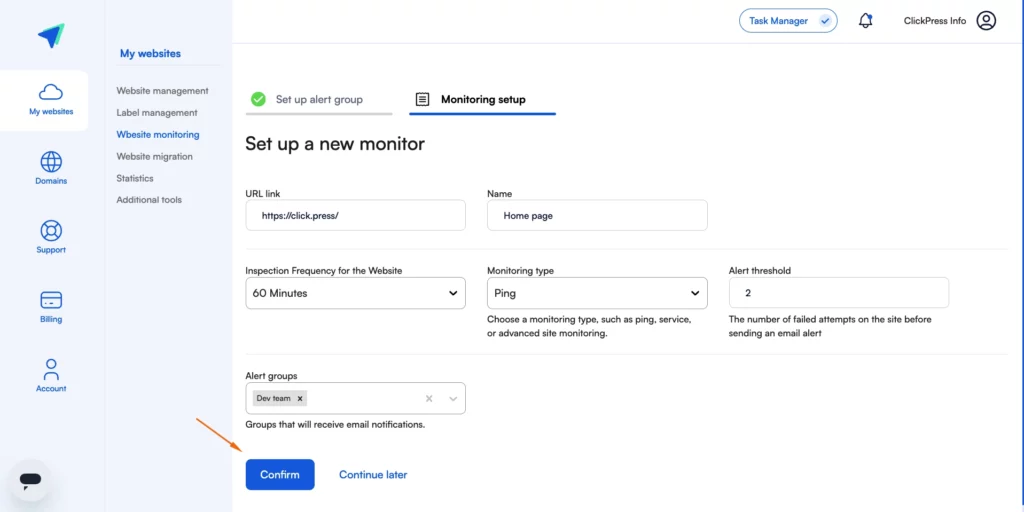
Step 3:
- Type in the website URL.
- Give a name, for example (Home page).
- Type the website name.
- Choose the monitoring type (Ping, Service, or Website).
- Define the number of failed attempts before sending an alert to the email.
- Click the blue button Confirm.
Related Articles
How To Change Hostinger DNS to ClickPress
A simple guide to changing your domain via NS referral from the Hostinger registrar to ClickPress hosting.
How To Change Namecheap DNS to ClickPress
A simple guide to changing your domain via NS referral from the Namecheap registrar to ClickPress hosting.
How To Change Domain.com DNS to ClickPress
A simple guide to changing your domain via NS referral from the domain.com registrar to ClickPress hosting.

